Coordinates
Summer takeoff: 46°22’37″ N 8°01’51″ E 1,900m ASL Orientation: SSE
Winter takeoff: 46°22’29″ N 8°01’12″ E 1,980m ASL Orientation: E

Riederalp takeoffs viewed from the north-east
Although plenty of the cracks choose to start their long XCs from Riederalp, I very much prefer Heimat, which is 200-300m higher, faces ESE rather than SSE (so starts working better earlier), and is quicker for me to access. However, it may be more convenient when the gondola to Fiescheralp is running on a restricted schedule for annual maintenance at the end of the ski season, and it becomes snow-free earlier in the spring due to its lower altitude. It may also be useful immediately after a cold front has come through and cloudbase has to rise to get above takeoff level before one can launch, as its lower level means that it will clear here when Heimat is still socked in (and stability is unlikely to be an issue). I only use these takeoffs a few times in the year, usually when Heimat has been temporarily unavailable or snowbound in late May/early June. They are conveniently located near the Riederalp West gondola station: the summer takeoff about 400m to the east, and the winter option a similar distance to the west. There is a very steep slope right next to the gondola station which some use, but I do not understand why, when it would be really easy to drop and lose some kit here, and a small mistake could easily result in injury.

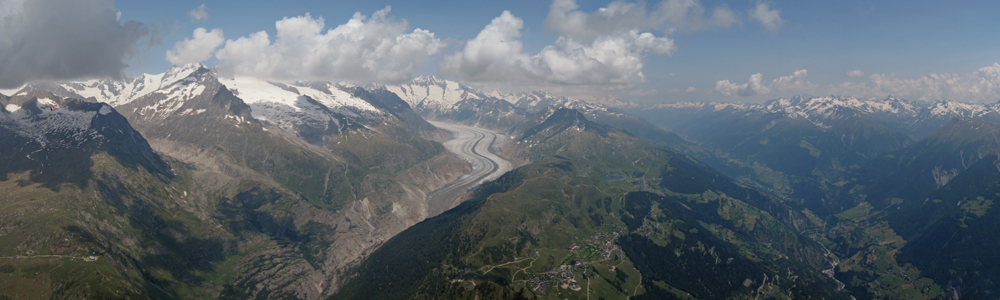
Riederalp summer takeoff, looking west towards the Riederhorn
The summer takeoff is a pleasant straightforward grassy slope, gently inclined at the top and gradually steepening. Thermals usually start to generate a sufficient cyclical upslope breeze to enable an easy reverse launch at the right moment from mid-morning onwards. If launching early, most pilots turn right and glide for some distance over to the forest slope below the Riederhorn, which faces east-south-east (as shown in the image above), to pick up their first climb (which often releases and strengthens at the peak itself). Later on, once the area is working well, there is usually a good thermal immediately to the left of takeoff, but it releases from the far side of the gondola cables which you must cross (and then often circle directly over) if you want to use this climb.
Your bomb-out option if you launch here and can’t stay up is the Bitsch landing field.
More details are available on the club website.